

Phase 1: Planning
Define Your Goal
Before opening Kleap, answer:- What problem does this solve?
- Who is it for?
- What are the must-have features?
- What can wait for later?
Feature Prioritization
Use the MoSCoW method:Example: Task Manager App
Phase 2: Setup
Choose Your Starting Point
- Use Template
- Start Blank
Start with a template if one matches your idea:
- SaaS Template - User auth, dashboard, billing
- Landing Page - Marketing sites
- E-commerce - Product sales
Initial Prompt
Start with a high-level description: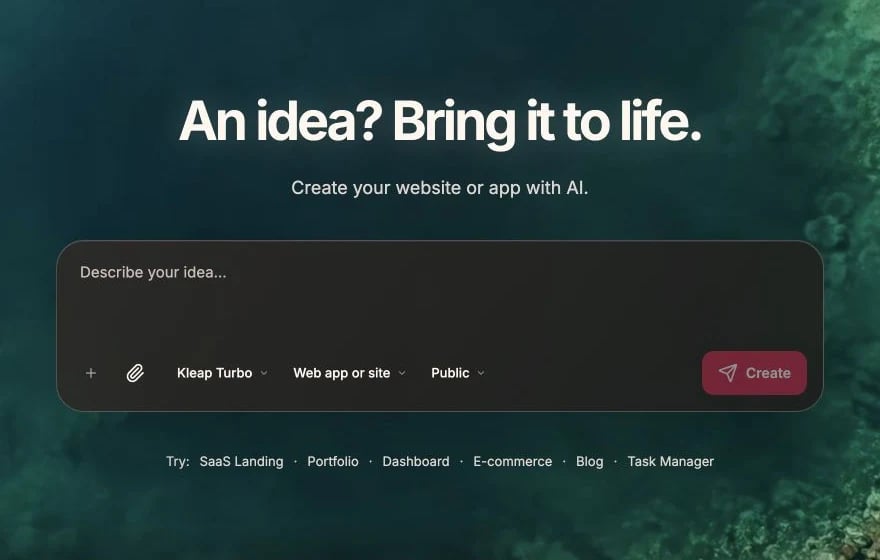
Describe the product, choose the format, then click Create
Phase 3: Build Core Features
Work in Layers
1
Layout First
Build navigation, footer, page structure
2
Pages Next
Create main pages with placeholder content
3
Components
Build reusable UI components
4
Data Layer
Connect database, define schema
5
Functionality
Add interactions, forms, logic
Example Build Sequence
One Feature at a Time
Don’t rush. Complete each feature before moving on:- Build it
- Test it
- Fix any issues
- Then move on
Phase 4: User Authentication
If your app needs users:Link Data to Users
Ensure data belongs to users:Phase 5: Polish
Visual Refinement
Responsive Design
Loading States
Error Handling
Phase 6: Testing
Manual Testing Checklist
- All pages load without errors
- Forms submit correctly
- Data saves and loads properly
- Auth flow works (signup → login → logout)
- Protected routes redirect properly
- Mobile layout works
- All buttons/links work
Test Edge Cases
- Empty states (no data)
- Long content
- Invalid input
- Slow network
- Different browsers
Phase 7: Launch Prep
Environment Variables
Ensure all secrets are in environment variables:SEO
Analytics
Phase 8: Launch
Deploy to Production
- Click Publish
- Wait for build to complete
- Test the live site
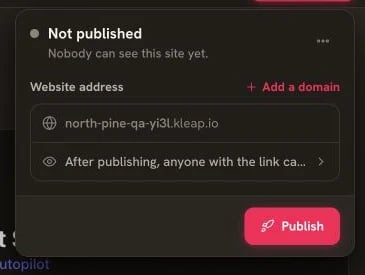
Check the address in the Publish panel before going live
Custom Domain (Optional)
- Add domain in settings
- Configure DNS
- Wait for SSL certificate
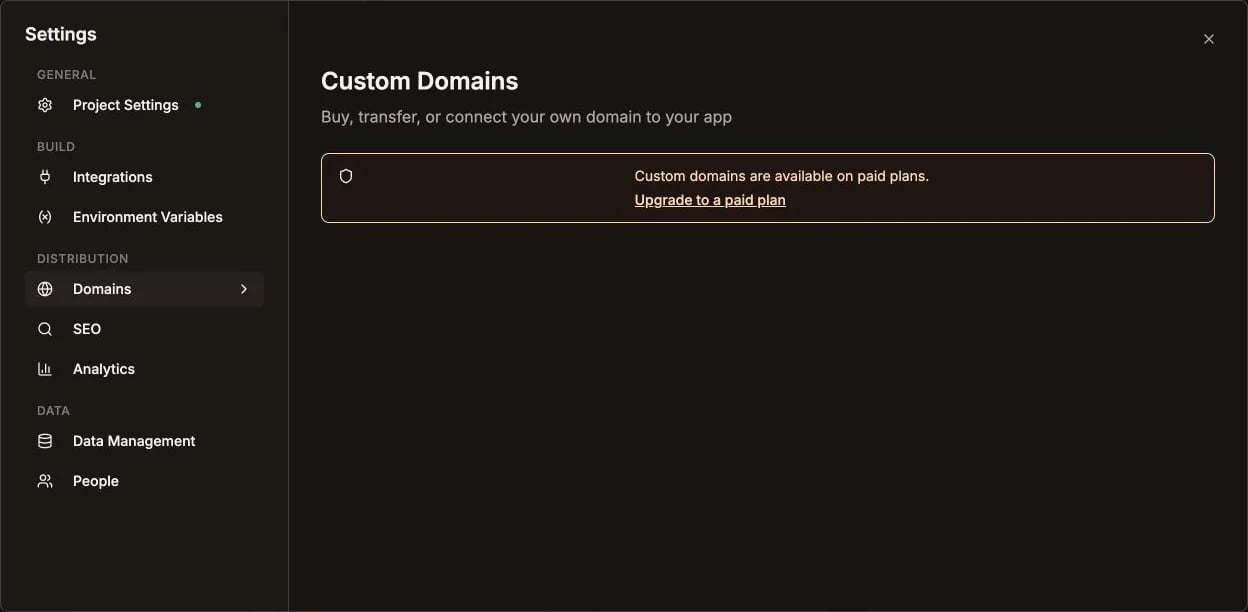
Custom domains are managed under Settings > Domains
Announce Your Launch
- Share on social media
- Post on relevant communities
- Tell your network
Phase 9: Iterate
Gather Feedback
- Watch how users interact
- Collect feature requests
- Track errors with monitoring
Plan Next Features
Go back to your “Should Have” list:Common Mistakes to Avoid
Building too much at once
Building too much at once
Launch with minimum viable features. You can always add more.
Not testing enough
Not testing enough
Test thoroughly before launch. First impressions matter.
Ignoring mobile
Ignoring mobile
Many users browse on phones. Always check mobile layout.
Skipping auth security
Skipping auth security
Always scope data to the signed-in user so each person sees only their own. One security hole can ruin your app.
Timeline Expectations
A simple app can go from idea to launch in:- Landing page: 1-2 hours
- Simple app (no auth): 2-4 hours
- App with auth & database: 4-8 hours
- Complex app: Multiple sessions
Best Practices
More tips for successful building